JTX1000

Replacing Myvi Absorber Top Mounting

The red circles show where the absorber top mounting.
The reason to replace is the annoying sound when the car hit bumper or uneven road surface.

Left and Right have different difficulty level. Left side is easier to replace then the right.

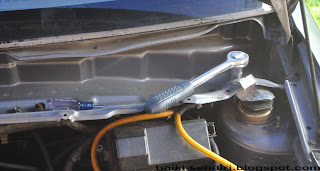
Loose the a nut size 17.

And a nut size 12.

And a nut size 12.

Jack the car.

Push down the brake disk and the top mounting will fall.

The rubber is worn out a bit after 1 year.
The top metal part is loose.

New ones. Comparable with old.

Rubber worn out.


Original Perodua Myvi Top Mounting


There is non circle hole.
This will keep the rod of absorber from rotating when the car is turning.

This is tricky part. 
Since the hole is not circle, the rod of absorber must be in line.
Need two people to work on this since the spring compressor is not around.

One needs to jack up and another one need to align the rod of absorber.

Right side is same as left except the method to install back.
Loosen the lower mounting to remove absorber.
Cover the driveshaft with clothes to avoid damage during this process.
Put some wood on the lower arm as in the picture.
Put absorber on the wood.
Slowly jack up and align the rod of absorber until you can tighten the nut size 17 for 2 or 3 round.
GOOD LUCK!


Warning:
This is a method to manually replace the top mounting without spring compressor.
It is not recommended for someone who not willing to try something more challenges.
More research and study might be needed to build up confidence.

Honda Prelude BA5 3rd Gen. Digital Climate Control

13 Pin Climate Control

17 Pin Climate Control

Compressor Control Unit Pin Out

Note: This is just guideline result from electronic reference and automotive forum. 
Upgrading may be failed if installer knowledge not sufficient in electronic and electrical theory.
Complete information may be needed before starting the project.
Good Luck!!

Daihatsu L7 / Perodua Kelisa Autoflip Installation Guide

Perodua Kelisa Dasboard Fusebox

The side mirror connector. 5 wires for autoflip and power adjust.

Autoflip wires. 
The button change the polarity to flip and unflip side mirror.

In Perodua Kelisa with fully manual side mirror, factory left the  connector.
Find suitable wire and plug in.

Kelisa with autoflip button.

Door side mirror connector.


Original power distribution for side mirror. 
R02 from key switch.
RC8 is ACC power for side mirror.
Verify it with key on and off. 
We dont want any current leak due to wrong pin.

Wiring diagram for non auto flip side mirror. 
Simply add 2 wires for autoflip from switch for both sides.

How to Remove/Clean Dirty/Paint On Car Windows

Material: Sand paper grade 1000 and thinner(or petrol).
Don't forget white paper for you to see the effect.

Soak the sand paper with sand paper and gently sand the paint/dirty.
It is quite faster with thinner since it is paint remover.

See the difference? This DIY is recommend before the window is going to be  tinted.

This window in this tutorial is from Japanese (I get from used spare part).

Happy DIY!!

Honda Prelude BA5 Autoflip Controller/Relay

This is Honda Prelude BA5 JDM Autoflip side mirror controller  connector.
After some research and testing, the wiring functions as shown above.
For the switching signal (BLU/YEL) to flip and unflip, the signal depends on 12V pulse.
Tap 12V and release, it will flip/unflip.
You tap and release again it will unflip/flip.
The push button is needed to produce the pulse.

Honda Prelude BA5 Key Cylinder Reconfigure

First you need 2 or more set of cylinder lock before proceed.
The more the better  and the faster the process.
Take out the pins and compare the pins.
The cylinder lock must have flat configuration.
This configuration still dont match  the key. Try to swap the pin again.
The pin. Some pin need to be modified in order to fit the cylinder lock.
Different pin. Some metal and some cooper.

The different.
Cylinder serial number.
Now, it is flat. Test it with the outer housing.
Several test may be  done to confirm the configuration.
Clean it and grease it. Good Luck.

Fixing Kelisa Original Radio Volume Control

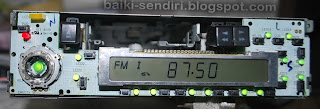
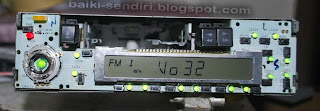
Perodua Car Radio

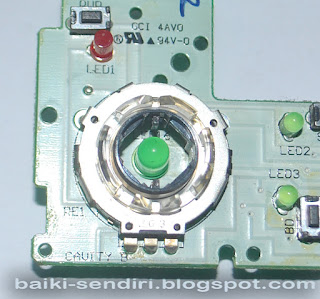
This is rotary encoder to adjust volume. It works by converting  rotation into pulses whether CW pulses or CCW pulses. If  you can find the rotary encoder exactly like this just buy it at reasonable cost or just buy new radio.

De-solder the circled. Use very good sucker or you will get frustration.

Removed rotary encoder from circuit board.

Find the teeth that touch the pulse copper track. Copper track is on the leftmost. 


Just like new. The volume control works very well. Don't know how long it will last since the rotary encoder is mechanical component.

Good Luck