 |
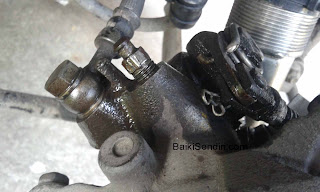
| Release hand brake and disassemble the brake cable. |
 |
| Add some anti rust to make the job easier. Pull out the lock pin. |
 |
| Use flat screwdriver to remove the pin. |
 |
| Use brake hose clamp to prevent brake oil drain. |
 |
| Spray anti rust and use impact driver to loosen the screw. Normal screwdriver also can work if the they are not too tight. |
 |
| Loosen the caliper bolts. |
 |
| Loosen the bracket bolts. |
 |
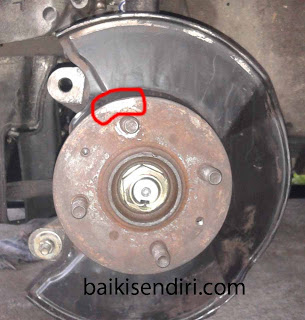
| Use 2 bolts sized 12 to pull out the disk. |
 |
| OEM Honda Brake Pad. 43022-SR3-003 |
 |
| Installation Procedure. |
 |
| One of the piston need to be replaced. This is branded new. 43215-SF1-003 . I bring the sample and the shop gave me this. If both pistons are broken, please consider to buy used caliper if available. |
 |
| Brake Caliper service kit. They matched Honda Accord SM4 also. |
 |
| 01473-SM4-010 01473-sf1-010 |
 |
| Inside the piston. |
 |
| Use this tool if you want to disassemble the piston. This step is unnecessary. |
 |
| Assembled! |
 |
| Snap Ring Plier. |
 |
| Useful tool. Also can use to rotate the piston. |
 |
| It is better to have long nose snap ring plier. |
 |
| Refer to last picture for component diagram. |
 |
| After cleaning, put new grease to the hand brake cam hole. |
 |
| Put new seal. |
 |
| Put the hand brake cam. |
 |
| Put new O-ring to the sleeve piston. Add some grease to the rod to be attached to the piston. There are 2 holes at the bottom of caliper. Match them and push the piston. |
 |
| Put snap ring to lock the piston. |
 |
| Put new piston seal and piston boot. |
 |
| Rotate ClockWise the piston until the piston is not going to any deeper. DONT COUNTER CLOCK WISE The piston must be positioned as in the picture to fit the brake pad. |
 |
| The slider pin boot also included in the service kit. |
 |
| All are ready. The quickest step is to install everything back to its original position. |
 |
| One person bleeding method. |
 |
| Adjust the hand brake if necessary. |
 |
| Reference. |
This DIY is for those have experience at least front brake service job.
You might face difference techniques and method in actual implementation.


