JTX1000

DIY - Changing Auto Transmision Fluid (myk gearbox)

 Tool required:

1. Small size extent with wrench (as pic below don,t know what size)
2. A container (buat tadah minyak lama)
3. Corong ( I use battery water bottle-cut at the middle and put a long hose at the cap)


Firstly, jack ur car or ram it high. if u don't have a ram, jack it and steer ur wheel to right-it easier to u to find the drain plug.


Let ur engine cool down a bit (if too hot u can't hold it or it'll damage ur thread). Loose the drain plug by using the extent with it wrench.Take out the ATF dipstick for better flow. Let it for a few minutes.


After that tight it back and start pouring 3 bottles the new ATF (automatic transmision fluid) through the ATF dipstick indicator hole.

Put the gear at N (neutral) position and start engine. Let the engine runs until ur radiator fan running. Stop the engine and check the ATF level. It's must in the hot range position. If not add more ATF.

p/s: make sure the gear in N position not P (according to my sifuu)

sorry no more picture-actually this car need to change the torque converter oil seal, the main bearing and connecting rod bearing without remove the cylinder head. here how it's look.
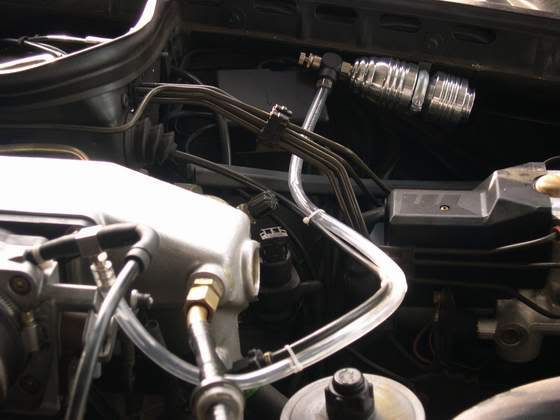
engine bay


Gearbox


The process (1st time the owner just want to change the gearbox oil seal after that he ask me to change the engine bearing pulak huhuhu)


Engine and bearing


Auther:amir_dead

DIY - Brake Piston and Calliper Service

Tools required:

1. 10mm spanar (common ring more better)
2. 14mm spanar (common ring or socket)
3. Pen knife or screw driver
4. Rags and sand paper
5. Jack and tools to remove ur wheel

Symptoms that happen that u know ur brake need to service:

1. Ur wheel can't turning when u jack ur car
2. scratching sound when applying ur brake
3. Brake pad wear
4. Brake jam

First, take out ur wheel. U'll see ur disc brake and caliper. By using 14 mm spanar or socket Loose the bolt that tighten ur brake hose and the caliper to ur knuckle. Take it out.


After that, by using 14mm bolt that using to tight ur caliper to ur knuckle, tight it well to the brake fluid inlet.

Then use 10mm spanar open the breather plug and by using the air duster blow inside the hose slowly until the piston come out. (CAUTION: Watch out ur hand/fingers-the piston may stamp). 


After that u will see inside ur caliper-YUCKS!!


Remove the dust cover and the oil seal inside. 


Clean up inside the caliper and if the stain won't remove use the sand paper to clean it up. Tadaaaa!!!!


Put back the new oil seal and the dust cover. Use a hammer and any tools to punch the piston to the lowest position. Then assemble like u see it before. Add the brake fluid (if u use dot 3 before better use the same type again) Start engine and breathing the brake to remove the air that trapped inside ur brake system.

Sorry no picture for the oil seal, dust cover and piston assembly-my hand really dirt!

Overall cost:
1. Caliper service kit RM 28

If u don't have the air duster and compressor just bring ur caliper to the nearest workshop-pinjam jap diaorg punya air duster tu


Author:amir_dead

Rear Fog Install / Rear Bumper Removal


DIY FROM CB7TUNER.COM

Tools:

-Dremel tool and attachments
-12mm wrech
-flat head screw driver
-phillips screw driver
-long nose pliers
-box cutter
-6mm allen wrench
-sand paper
-electric tape
-24inch wire (only had some speaker wires in hand)
-silicone adhesive sealant
-1 self threading philips screw

REAR BUMPER REMOVAL:
-remove all visible philips screws on both left and right side of the rear bumper

-from underneath the bumper, you should see a plastic cap covering the nut for the bumper support
(1 on each side), pry out plastic retaining clips with the use of a flat head screw driver.
-remove the nut with the use of your 12mm wrench.

-while under the bumper, you should see 3 plastic retaining clips, remove them by using a self 
threading screw. screw in securely and pull it with your pliers, the plug should come with the screw. 
then pry out the retaining clip with a flat head screw driver.
-from inside the trunk, you should find 2 rubber plugs covering the last 2 12mm nuts holding the bumper.

-you are now ready to slide out the bumper away from the car. lay it down on some towels to 
avoid messing up the paint on your bumper.

EF REAR FOG INSTALL:
-separate the inner bumper support from the bumper cover by removing the plastic retaining clips with 
the above mentioned method. there are 12retaining clips (3 at the bottom and 9 on top).

-in an OEM 90-91 rear bumper, you should see an outline on where to cut (i just used some white 
chalk to clearly define the outline).

-with the use of your Dremel and a steady hand, follow the outline and cut away. sand down any 
rough edges manually and you'll get to this..

-test fit your EDM EF rear fog and make the necessary adjustments.

-cut the styrofoam padding of the bumper with the use of a box cutter to accomodate the rear fog. 
i also had to cut a portion of the rear fog housing for it to sit flush with the bumper support installed. 

-use a 6mm allen wrench to remove 4bolts holding the rebar from the bumper frame. cut through 
the fiberglass rebar as it will push the rear fog out if you don't. on the pic, you should only cut on 
the highlighted area(cut too much on mine and there's no way of glueing it back!). also, there might be 
a way not to leave out one of the allen screw, but it was too late in my case when i thought of it.

** if you have another tool for cutting fiberglass, use it. i only had a dremel on hand and cutting through 
the fiberglass rebar added a good hour on my install.

-run your wires through this grommet and fill it with some silicone.

-put everything back together. stand back and admire your work. 

Author:CB7TUNER.COM

How To Fix The Micro Compressor On Yours Vehicle

Dear Havoc's

I found this manual and love to share with some of you guys out there maybe interested to try and DIY...

Follow the manuals
1. Check original rpm before installing Micro Compressor. (Ensure air-cond is on off mode)
2. Switch off the car engine.
3. Remove the hose connection from manifold supply air inlet.
4. Reconnect the hose with "T" joint and link it to the additional hose provided.
5. Preferably, fit the unit away from heat area.
6. Shorter hose would be much advantageous.
7. Place the unit slanting positon at the angle ranging 15' to 45' degree gravity magnitude.
8. Air vent-screw should be tighten up before switch on the car engine.
9. Start car engineer and wait for a few minutes.
10. Counter tuning by adjusting the air vent-screw to obtain original rpm reading or reading or engine become stable.
11. Please refer to the below installation guide diagram.


Happy D.I.Y....


Author:

DIY - Throttle Body Cleaning..

Bored at home (missus & son was sleeping like there was no sleeping for 2 days) i came across of doing this..took me around 30 mins or so..prepped myself with the following :-


1. phillips screwdriver
2. #10 spanner
3. used toothbrush
4. CRC carb & TB cleaner
5. used cloth

firstly,where is it?? located on top of the engine bay with the PGM-FI mark..the thing is connected to an elephant-trunk like hose..all you have to do is to open it up..
but first, disconnect the battery..


then, the hoses and connectors that would obstruct your work..

take the screwdriver and screw off the clamp underneath..

take the trunk out and you could see the TB's mouth..


take the CRC cleaner and spray it inside the TB..open the throttle by pushing the intake lifter located beside the TB..using the toothbrush, brush all the way inside it (as far as u can go)and this is what happens..


after finishing that,take the cloth and wipe all the stains out..
put back all the hoses and connector back to its place..connect the battery and start the engine..you'll notice that the engine is quite hard to start and when it starts, it jerks a little bit..in some cases, white smoke will appear through the exhaust..this is where it emits all the sampah sarap inside the TB..take it for a spin..you'll notice the difference..

~end~
 
Author:

DIY - Fixing Intermittent Starting/ Main Relay problem

Semoga dapat membantu.

Main relay symptoms are:

* Car won't start when hot outside
* Car won't start after parked for just a minute.
* Car starts but quickly dies . A second cranking attempt will crank but no signs of catching or any strong rpm movements.
* Once started the car won't stall. After the car runs for a couple minutes, the symptoms return after shutting off the engine.
* Windows have been rolled up on a hot day when problem occurred.
* The heater was on before turning the car off.
* No (humming) sound from the fuel pump the moment the ignition switches ON.
* No click sound after the ignition key turns on or
* No click sound two seconds after the ignition turns on.

Solution 1: Replace the main relay. (Some step can apply)
Solution 2: Remove and repair the main relay. (This is what we gonna do)
Solution 3: A temporary fix. (Bang on the dashboard or the main relay with the ignition ON until you hear the fuel pump running.Then start the car quickly. Don't shut off the car while the car is running or you will not be able to restart.

FiXING the Main Relay.

1.Gently remove the panel under the steering. Watch out for clip listed or u might broke it.


1st step done and look light this
Image

2.Locate the main relay. Its on your left leg side


3. Untight the screw shown and remove the main relay from bracket


This is Main Relay look light


4.Using a flat screwdriver pry it open and pull it out


5.Time to re-solder the relay.


In my case, got cold joint as shown, but i dont want to take any failure chance later so i resolder all the contact point.Just beware, dont take to much time solder each point or u might bring heat up and melt the relay below(the plastic part)


6. Reassamble the relay.The main relay will only go in one way into the housing.
7.Installation in reverse order. Put everything back.
8. Fire up your engine. If still cant start. Go buy another main relay since u dont have talent to DIY.

ADIOS

Author: