The red circles show where the absorber top mounting.
The reason to replace is the annoying sound when the car hit bumper or uneven road surface.
Left and Right have different difficulty level. Left side is easier to replace then the right.
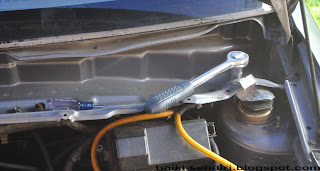
Loose the a nut size 17.
And a nut size 12.
And a nut size 12.
Jack the car.
Push down the brake disk and the top mounting will fall.
The rubber is worn out a bit after 1 year.
The top metal part is loose.
New ones. Comparable with old.
Rubber worn out.
Original Perodua Myvi Top Mounting
There is non circle hole.
This will keep the rod of absorber from rotating when the car is turning.
This is tricky part.
Since the hole is not circle, the rod of absorber must be in line.
Need two people to work on this since the spring compressor is not around.
One needs to jack up and another one need to align the rod of absorber.
Right side is same as left except the method to install back.
Loosen the lower mounting to remove absorber.
Cover the driveshaft with clothes to avoid damage during this process.
Put some wood on the lower arm as in the picture.
Put absorber on the wood.
Slowly jack up and align the rod of absorber until you can tighten the nut size 17 for 2 or 3 round.
GOOD LUCK!
Warning:
This is a method to manually replace the top mounting without spring compressor.
It is not recommended for someone who not willing to try something more challenges.
More research and study might be needed to build up confidence.


